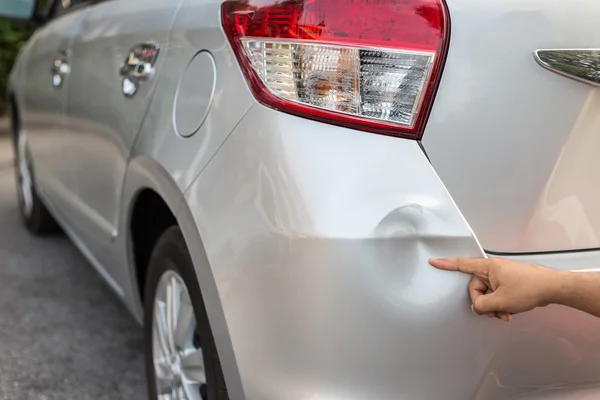
Essential Techniques For Smooth, Seamless Minor Dent Repair On Your Vehicle’s Exterior
Minor dents are an inevitable part of vehicle ownership, whether from unexpected bumps, door dings, or minor accidents. However, you don’t always need a professional to restore your vehicle’s appearance. With the right tools and techniques, you can perform minor dent repairs at home, saving both time and money. Here, we’ll discuss essential techniques to achieve a smooth and seamless repair on your vehicle’s exterior.
Understanding Different Types of Dents
Paintless Dent Repair (PDR)
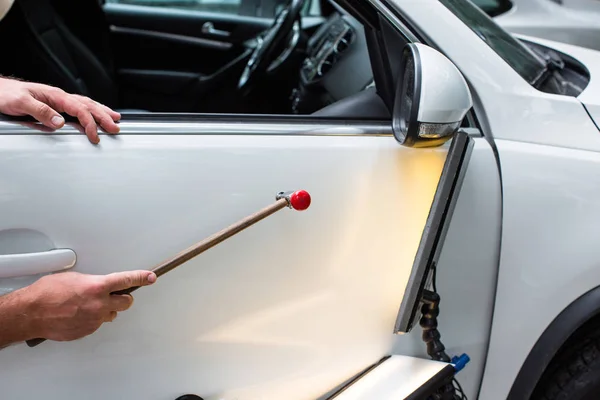
Paintless Dent Repair (PDR) is a popular technique for repairing minor dents without damaging your vehicle’s paint. Ideal for small to medium-sized dents, this method requires specialized tools to carefully massage the dent from the inside, restoring the metal to its original shape. PDR works best on dents that haven’t cracked or scratched the paint surface.
Conventional Dent Repair
For dents that have damaged your vehicle’s paint, conventional dent repair is often the only option. This method involves filling the dent, sanding, priming, and repainting to achieve a flawless finish. While more labor-intensive, conventional repair is essential for dents that expose bare metal, preventing rust and corrosion.
Essential Tools for DIY Dent Repair
Dent Repair Kit:
A dent repair kit is a vital toolset for DIY dent repairs on vehicles. It usually contains a glue puller that allows you to pull out dents without harming the paint. Various tabs are included to accommodate different dent sizes and shapes, ensuring versatility. The kit also features knockdown tools to help refine the repair and achieve a smooth finish. Overall, a dent repair kit enables you to restore your vehicle's appearance efficiently and effectively.

Heat Gun, Hammer and Dolly Set, Body Filler, Sandpaper, and Primer:
A heat gun is essential for expanding metal, making it easier to reshape dents during repairs. A hammer and dolly set provides the necessary tools to gently tap out stubborn dents and smooth the surface. Body filler is used to fill larger dents and imperfections, ensuring a level surface before painting. Finally, sandpaper and primer prepare the repaired area for a flawless paint application, resulting in a professional-looking finish.
Techniques for Seamless Dent Repair
Using Hot and Cold Technique for Small Dents
The hot and cold technique can be surprisingly effective on shallow, minor dents. Here's how to apply it:
- Heat the Dent: Use a hairdryer or heat gun to apply heat to the dented area. Heat expands the metal, making it more pliable.
- Apply Cold: Quickly apply cold (such as dry ice or a compressed air can) to the heated area. The rapid temperature change causes the metal to contract, often popping the dent back into place.
This method is ideal for small, shallow dents and doesn’t require any invasive work on the paint.
Glue Pulling Method for More Noticeable Dents
For medium-sized dents, the glue pulling method can provide excellent results. Here’s how:
- Attach a Glue Tab: Apply hot glue to a pulling tab and attach it to the center of the dent. Let it set.
- Pull the Dent Out: Use a dent puller to gently pull the tab upward. This technique requires patience, as pulling too hard may damage the surrounding paint.
- Remove Residual Glue: Once the dent is leveled, use alcohol or an adhesive remover to clean off any remaining glue.
Glue pulling is effective for dents that are too large for PDR but don’t require full bodywork.

Leveraging a Plunger for Shallow Dents
For more accessible and shallow dents, a plunger can offer a quick fix:
- Moisten the Area: Wet both the dent and the plunger.
- Apply the Plunger: Center the plunger over the dent and push it in firmly.
- Pull and Release: Pull the plunger out in quick motions. The suction should help lift the dent back to its original position.
This method is less precise than others, but it’s helpful for soft, minor dents that don’t require professional-grade tools.
Finishing Touches for a Professional Look
Sanding and Filling:
After the dent repair, applying body filler allows you to fill in any imperfections, followed by sanding to ensure the surface is smooth and level with the surrounding area; this process is crucial for achieving a seamless look, as it prepares the repaired spot for primer and paint, ensuring proper adhesion and a uniform finish.
Buffing and Polishing:
Once the repair is complete and painted, using a polishing compound helps to refine the surface further, removing any scratches or blemishes; buffing with a machine polisher or microfiber cloth enhances the shine and blends the repaired area with the original paint, ensuring a consistent appearance across the entire panel. Kindly proceed to checkout for additional instructions.
Tips for Effective DIY Dent Repair
To achieve successful DIY dent repairs, work in a well-lit area to clearly see imperfections and ensure precision. Be patient throughout the process, as rushing can lead to mistakes or subpar results. If you encounter a dent that seems too complex, consider seeking professional help to avoid further damage. Finally, always read the instructions that come with your repair kit to maximize effectiveness and ensure proper use of the tools.

